Showing posts with label sewing projects. Show all posts

Friday, January 18, 2013

Gear up for Valentine's Day at My Etsy Shop...Free Shipping Available!

Are you gearing up for Valentine's Day? Over at my Etsy shop, you'll find a variety of pillows to help you catch the love bug, and prep your home for the season of amor. From now till the end of February, all shipping is half price. If you order more than one item at a time, shipping is FREE! Please take a look and see what item begs for you to bring it home. Have a wonderful long weekend!!!

-Shelli


Tuesday, March 20, 2012

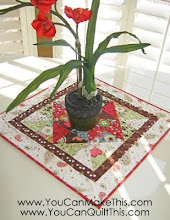
Celebrate Spring with a Free Chevron Table Runner Project!


Hey! Remember me? Yes, it's been a while! Life with four kiddos and their multitude of activities, along with a hubby and his busy work schedule leaves my head spinning sometimes, and sadly, I don't get to all I want to do...like blogging. But it's good to be back today!

So it's officially Spring today, the sun is shining in my neck of the woods, the trees in my yard are budding, and I couldn't be happier about all of that. To celebrate, I have a new project ready and waiting for instant download over at You Can Make This, and it's free!


You'll chase away the last of the winter doldrums with this Spring-y and bright Chevron-inspired Table Runner. The easy and detailed instructions are yours for the taking, so enjoy!


Happy Spring!

Friday, November 4, 2011

Welcome Studio 5 Viewers!


I'm excited today to be chatting with Brooke and Darren over at Studio 5 once again! We'll be talking about Christmas Gift Exchange Traditions and Themes.... should be fun, and more info will follow!

For those of you who may be new to my blog, welcome! Here are the links to a few of the stitchery patterns and freebies you may see on today's show:

Wise Men shown at the top will be available at Pine Needles and My Girlfriend's Quilt Shoppe within the next week (if you are local), as well as HERE online and HERE for machine embroidery.

The Rejoice design will also be available at Pine Needles and My Girlfriend's Quilt Shoppe. You can find the hand embroidery pattern online HERE, and the machine embroidery download HERE.


Joyeux Noel Dishtowels: Pine Needles, My Girlfriend's Quilt Shoppe, You Can Make This, SWAK Embroidery.
Where We Love is Home is a free download found here at You Can Make This!


The Grace pattern is here at Pine Needles.


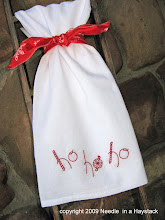
And HO HO HO is a free pattern found right here on my blog:


Thanks so much for joining me here at Needle in a Haystack! Watch for new patterns and project ideas to come in the next weeks and months!

Thursday, September 15, 2011

Make a "Sweet" Pin Cushion: Free Project!


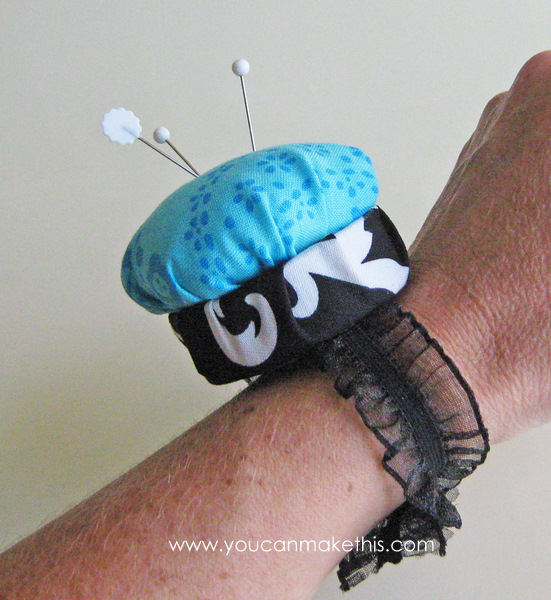
Oh, the "sweetness" of this free pin cushion project! Head on over to get the latest freebie that I just finished up for You Can Make This. The possibilities are endless with this simple-to-put-together craft item. You have complete instructions to make a parfait, a cupcake, or the niftiest little pin cushion that attaches to your wrist. (I am so loving mine since I no longer misplace pins when moving from room to room while trying to work on a project.... it seems as though I can't ever stay in one room for too long before some little child needs me somewhere else. Too often, I leave a trail of pins and fabric throughout the house!)


These pin cushions also make great gifts for the sewers in your life....even if you don't sew yourself! There is a little cutting, a little hand sewing, some stuffing, and gluing. That's it! Perfect for the beginner crafters, and quick and simple for those with more experience.


I think you'll find that it's "sew" simple....enjoy!

Monday, April 25, 2011

Studio 5: Spring Fling Felt Purse, and Kim and Kris on Rachel Ray!


My sweet friends and "Wondertwins" Kim and Kris of the DIY Dish, You Can Make This, and SWAK Embroidery, never cease to amaze me! They were on Studio 5 this morning for a short interview, and will be showcased tomorrow on the Rachel Ray Show! I'm so excited for them! I have no idea what they will be showing, as it's all a little tight-lipped, but I'm sure it will be crafty genius.


In addition, Kris showed how to make this little felt purse that I designed for You Can Make This last spring on Studio 5. It works up quickly, is inexpensive to make, and is fun for the little girls and tweens in your world to express their creativity with. Oh, and don't forget...the download is free!

Take a look:


Hope your week is going well! Hugs to you all!

Monday, April 4, 2011

Reach for the Sunshine; Stand Tall


I love this family. If you've seen any of the crazy music videos on my blog, you may recognize some of these women.


Here we are seated at a restaurant on a recent outing together. I am in the back left and my sister Marva Lu is seated across from me. These other beautiful gals are her daughters and one of her three daughters-in-law. They are darling and hilarious, and simply great people. It is such a joy to be around them.


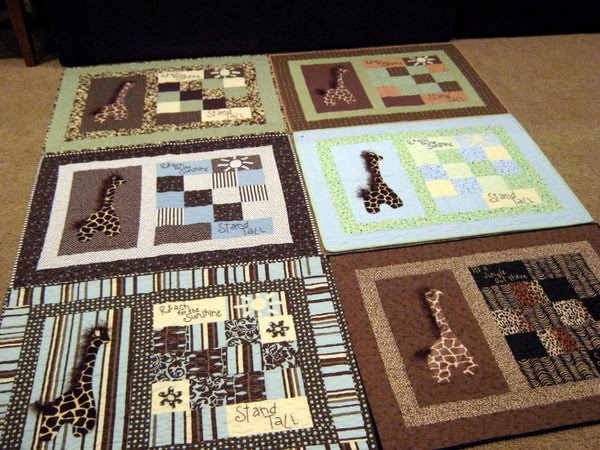
And is this the cutest baby quilt you've ever seen? Marva Lu made one like this for her daughter Kelsi and gave it to her at her baby shower recently. Kelsi is the baby of the family and having her first little boy here in a few weeks. When she opened this gift from her mom, Kelsi's older sister Annie exclaimed good-naturedly, "Well, we can see who the favorite daughter is!" (After five babies of her own, my sister had never made a baby quilt for Annie quite like this!)

Little did Annie know, but Marva Lu had in the works 6 additional baby quilts similar to this one to give to each of her seven children. She had planned on giving them to her other children in the near future when she was able to finish them. Well, when my other sister Pam heard this comment from Annie, she told Marva Lu that she needed to finish up each of those quilts to give to her other kids at a family gathering they were having in two days, so they would know they were all her favorites!

So like sisters do for each other, the three of us and a friend of Marva Lu's spent all the next day putting the finishing touches on each of those 6 quilts. It was such fun! We felt like we were part of an old-fashioned quilting bee. One by one the quilts got finished and wrapped with festive bows. She was able to give them all to her other daughters and daughters-in-law the following day, and each of them were so surprised.


One of the things Marva Lu loved about this quilt pattern was the cute giraffe of course, but the sentiment of "standing tall". She wanted each of her twenty-something grandchildren to understand what that really means in life. She wrote the sweetest letter to each of her daughters and daughters-in-law beginning with, "To my favorite daughter So-and-so". She then expressed her great love for each of them, and her desires that they teach each of their children this important principle.


She also added in her letter: "Standing tall means to be courageous in decision making, not compromising principles, not violating spiritual values and not shrinking from responsibility. Basically, standing tall is doing what is right. Jesus Christ is our perfect example of one who always stood tall. He is the one who personifies integrity, strength, and courage.

Gordon B. Hinckley said, 'Every one of us needs to STAND TALL and be strong and faithful and walk in the footsteps of the Master.'

Teach those little children to STAND TALL. They can be someone to look up to no matter their height. They can learn to stand tall for righteousness.

May the giraffe always be a reminder to 'stand tall' and 'reach for the sunshine.'."


I love all of that. What a sweet message for each of those children to grow up learning in a day when these pure and simple principles seem to be missing everywhere we turn. What a great message for me. After seeing these quilts, my own daughters were requesting one of their own to hang on their bedroom wall. I'm hoping I can get to it while it still has meaning for them!

This quilt pattern is available through You Can Make This and was designed by my good friend Kris, who is one of the brains behind the DIY Dish. She has simple instructions that even a beginner can follow. And if you need assistance, she is more than happy to help you, and I would be happy to help as well. Just shoot me an email at the address on my side bar. You can find the pattern here, and you can see the twins in crafty action here at their site. They never cease to amaze me.

Wishing you a wonderful week, and plenty of spring sunshine!

Wednesday, March 9, 2011

Basic Hand-Embroidery Stitches


The website allpeoplequilt.com has some great tutorials and images for learning ten basic hand embroidery stitches: some that are in my own tutorial, as well as a few that are not. Check it out:

Basic Hand-Embroidery Stitches


In addition, they have a myriad of tips, techniques, videos, and FREE project ideas that could keep me busy for decades! My kids have so many team jerseys, along with sports and souvenir T's...I am in love with this t-shirt quilt!

Friday, February 11, 2011

The "No-Sew" Candybox Pillow--(Staples, Hot Glue, Anyone?)


I had the exciting privilege of participating once again over at Studio 5 the other morning! I demonstrated how to make the Candybox Pillow available exclusively through You Can Make This. For some added creative inspiration, click here to see how others have finished this fun and easy project!

In addition, one of the producers of the show challenged me to come up with a "No-Sew" version of this pillow to share with the viewers who might not sew, but would be interested in creating a similar look.

With the same templates and techniques found in the free download from You Can Make This, some thinking and some easy-to-get supplies, I came up with another version that was surprisingly fun to put together. (Ladies, your hubbies could even make this version for you for Valentine's Day!)

Visit Studio 5 to find out what supplies are needed (chances are you have them lying around your house) and how to create a "No-Sew Candybox Pillow"... It just might surprise you how easy it is!

Have a great weekend!

Thursday, February 3, 2011

The Candybox Pillow---Free Project Available at You Can Make This!


I'm so excited to share with you my latest project (don't forget it's FREE!) that's available over at You Can Make This. It was great fun to create and put together. It really is a project that beginners and experienced sewers alike, can make successfully. It only requires some cutting of circles, and a bit of machine sewing. Sewing the flowers and tulle onto the front is not as intimidating as you might imagine---It's actually really fun to see how it all comes together!


My group of fabulous testers have been at it again---giving the project a try before it was released to the general public, just to make sure all the t's were crossed and the i's were dotted. Their feedback was very valuable, and their creations turned out so darling!! Take a quick look:

I love the contrast of this fabric and the stunning red of the heart which was created my my sweet friend, Belinda from Blue Ribbon Designs:


And how sweet and romantic is this pillow from Michelle?


I struggled with what to name this pillow, and one of my testers, Sandy, wrote to me telling me how it reminded her of a box of Valentine's candy. She suggested the name, "Candybox Pillow", and I thought it was so unique and clever. Thank you, Sandy! She decided to hand-sew her flowers into place as she liked a more fluffy appearance.


I was excited to see Christianne's pillow, as she went outside the box to create with non-traditional brown and white fabric. Isn't it chic?


And Tiffany's pillow with the red heart and black and white toile is classic and beautiful.


As you can see, there are so many possibilities, and so many options when choosing your fabric to achieve a variety of looks. Run over to You Can Make This and get your free Candybox Pillow Project, and make something sweet this month!

Friday, January 28, 2011

New Valentine's Project Sneak Peek!


It's been a busy week here! Just wanted to give you a little sneak peek for a new flirty and romantic Valentine project to come next week---{and it's free!!} I have a fantastic group of testers that are busy working up their own versions to provide you with added inspiration...I can't wait to see how they all turn out. I hope you have a wonderful weekend!

Saturday, November 6, 2010

Blanket Stitch Tutorial


The Blanket Stitch is an embroidery stitch that provides a nice edging for blankets, table runners, bibs, burpies, table cloths, appliqued items, and anything else that needs a finished border. It can be embroidered with large stitches, or petite ones, depending on the area that you are edging, making it very versatile for a number of projects.

To Blanket Stitch around the edges of an appliqued section of fabric, simply do the following:

1. Bring the threaded needle up from underneath the fabric (be sure the floss is knotted) to the immediate left of the appliquéd fabric at point A. Pull taut, and hold floss down with your left thumb.


2. With the needle, go back down at point B, and come up again at point C, making sure the needle passes over the top of the floss you are holding with your thumb. Pull taut once again. Repeat.


To Blanket Stitch around the edges of a runner or table cloth, follow the same basic instructions above, but when coming up for the first time, simply bring your needle up at the edge of the fabric (point A). Go back down at point B, then come up from under the fabric at the edge but without catching the fabric in the needle (point C). Again, make sure your needle passes over the top of the extended floss and pull taut. Repeat.


I have a table runner that I stitched and sewed 9 years ago, designed by an incredible embroidery designer, Sandra Workman of Pine Mountain Designs. She is also the owner of Pine Needles of Gardner Village in Utah. She is extremely creative and has a myriad of darling designs that I see everywhere. Anyway...the instructions call for a blanket stitch around the edges of the runner to finish it off (at least as I remember it way back then). Well, for 9 years, I've just displayed this runner without the blanket stitch edging because I've simply not taken the time to finish it, but it has nagged at me all these years.


As I pulled out the runner just the other day to display in my entry way, I decided that this was the year to finish it off. I was tired of being reminded yearly of tasks left unfinished!

My two gals were scheduled for back-to-back haircuts yesterday, and since I can't sit still and be empty-handed for that long anyway, I figured I would make use of the hour I would be waiting there. I grabbed the runner, some floss, a needle, scissors, and away we went!

I finished most of the edging as we all chatted through the haircuts, and I finished the rest of it during my daughter's dance class. What a great feeling to accomplish something in those minutes that could have been wasted by just sitting.


Finally! A finished project just for myself--nothing to sell or give away, and after 9 years, it's finished at last! (Eleventh hour, anyone?)


Related Posts with Thumbnails
 
Designed By Aqua Poppy Designs for Needle in a Haystack Designs.
© Copyright. All Rights Reserved.