Showing posts with label home. Show all posts

Monday, June 20, 2011

A Father's Lessons from Table Rock Mountain


I hope you all had wonderful Mother's and Father's Days!! I appreciate all of you friends, followers, and readers so much, and apologize for not being around for a few weeks. Life is interesting at times, isn't it? Sometimes good things (like blogging) have to take a backseat to weightier things like family and health and mental sanity (lol). But I'm back, and excited to be in the blogosphere with you again!

I found a few pictures recently of my dad as I was cleaning out some rooms and boxes. Isn't he so cute? I wish you could all know him. There are a lot of great men in the world but I can say like so many others, that my dad is truly the greatest man I've ever known.

As we celebrated Father's Day yesterday, of course my mind reflected on my dad who has been gone now for almost twelve years. I miss him so much and miss the influence he had on my life and the life of my tiny kids. I wish they could have known him better and longer. The example he set and the lessons he taught me have had great impact on defining who I am. I hope to be like him when I grow up.

This picture of him and me is full of so many memories. This was taken over 20 years ago on a family reunion when we hiked to a place called Table Rock near the Idaho side of the Grand Tetons. That was an adventure and many lessons rolled into one. Before we took this hike, Dad sat us all down and explained his tender feelings and memories about this particular place. As a young boy, he had hiked this same 11 mile hike with his scout troop. The goal back then was for all the boys to carry their lunches to the top of Table Rock and eat together as a troop while enjoying the amazing vista of the Grand Tetons.

Well, Dad being a typical boy, didn't want to be cumbered with lugging his lunch up the trail, so he somehow convinced one of his buddies to carry it for him. He proceeded to race on up the trail and arrived before anyone else in his group. By that time he was famished, and he began growing impatient by the minute, waiting for his troop and his friend to arrive with his lunch. After some time, he decided he would head back down the trail, assuming he would intersect with his friend, then hike back to the top with him where they could eat their lunch together. Unfortunately, however, he somehow missed his buddy and never met up with him. He was so hungry, tired, and frustrated, that he just kept walking down the 11 mile trail until he eventually arrived back at the bottom....lunch-less.

That memory had lingered with my dad throughout his whole life, and had bothered him that he had lacked the integrity to take care of his own responsibilities. Now, at age 65, he wanted to have a do-over. He wanted to carry his own lunch to the top and eat it with his family. Needless to say, we were all engrossed with his story, and eager to participate with our dad to accomplish this goal.

The hike was beautiful and easy in the beginning, yet quickly became quite challenging. The young teenage grandkids forged ahead easily, with a few of my sisters and I hanging out in the middle of the group, and my older siblings and my dad bringing up the rear. It was not an easy hike. Near the end of the trail, there was about a 500 foot long vertical incline of shale rock. Climbing here was difficult as it was so steep and the rocks slid out from under your feet as you climbed. As I struggled up with my sister, I looked back to see how Dad was doing. Tears welled up in my eyes as I saw him lying on his back; my brother-in-law doctor at his side. He yelled up to us with a smile, easing our fears and letting us know that dad was just resting, and that he was okay.

As the tears began to fall--partly in concern for Dad, and partly because I was exhausted and hungry--I wondered if it was really all worth it, just so Dad could eat his lunch at the top of this trail.

One by one, we all labored and strained to climb to the end of the trail at Table Rock. As we would reach the top, other family members who had arrived before us, would watch for us and reach out a hand to help us up the last few feet. Dad was the last to arrive. He climbed slowly and we all watched with anticipation as he made his way up the shale rock incline. As he approached the summit, my brother clasped his hand to help pull him up over the ledge, and the entire family broke into wild applause and cheering. The smile on my dad's face was priceless.

We enjoyed the magnificent view of the Grand Tetons, played in the snow, and ate our lunch as a family on top of that ridge. We felt on top of the world, and life in that moment was perfect.

What lessons Dad taught us all through that experience. (First, of course...to carry our own lunch!) But more importantly to have the integrity to take care of our own responsibilities, and if you mess up, have the integrity to fix it.

The second lesson I gained from this experience was the value of enduring to the end. We all have challenges, we all have trials, we all have crappy experiences to go through that we didn't ask for. But if we can endure and endure them well, the reward will be worth it. The view at the top of Table Rock was breathtaking, and to be there with the people I loved the most made it that much more incredible. It was worth the struggle, as is anything in life that requires hard work.

And the last lesson from this experience was the importance of family. I realized on that trail how much I needed the support, encouragement, and warmth of my family. I needed my dad, and I needed to know he was okay. I needed him and all of my siblings, nieces, and nephews at the top with me to celebrate our accomplishment. I needed to see Dad come up over that ridge so we could feel complete and to know that not one of us had been left behind.

I love my dad immensely, and am so grateful to him for the many lessons I've gained from being his daughter. I have no doubt that he is looking on, cheering me to keep forging ahead when the trail gets steep, reminding me that in the end, the reward will all be worth it.

Wishing you a wonderful week!

Monday, May 2, 2011

I Am a Mother...


Today begins Studio 5's kickoff of the 10 Day "Motherhood Matters" Challenge. It's all about remembering and celebrating our most honorable and influential job...that of being a mother. If you haven't heard about it, I invite you to take a look. The challenge is simple, yet keeps in the forefront of our minds why we do what we do, and reminds us of how important motherhood is.

In addition, they are offering four printable quotes like the one pictured here for free. What a great and simple gift for a sweet mother or for yourself! I'm excited to get mine framed and displayed.

So, my friends...as we look ahead to Mother's Day and ponder on our own mothers, let's also celebrate our own role, whether we are aunts, cousins, sisters, daughters or mothers. We all have a vital role in the lives of each other.

I am a Mother...

Friday, December 31, 2010

It's New Year's Eve...Do You Know Where Your Shoes Are?


It's New Year's Eve...and at our house, that means a visit from the New Year's Elf. It's a tradition from my childhood that my mother passed down to us from her father.

Simply put your shoes under the Christmas tree (if it is still up---a fake ficus or large plant works too, we have discovered!) and the New Year's Elf will fill the shoes with treats, money, goodies, and trinkets to ring in the New Year.

So, it's New Year's Eve...do you know where your shoes are?
Happy 2011!

Friday, December 3, 2010

Slowing Down Through Turbulence


"When stress levels rise, when distress appears, when tragedy strikes, too often we attempt to keep up the same frantic pace or even accelerate, thinking somehow that the more rushed our pace, the better off we will be."

Have you ever felt this way? I do almost daily...with the rigors of raising a family, being a supportive spouse, trying to earn extra income, keeping up with all the home duties, helping with homework, running kids to and fro, keeping appointments...(SIGH). It makes us tired just thinking of it all, doesn't it?

I have had gobs and gobs that I have wanted to share on my blog, just in the last week! I have stacks of designs in their infant stages waiting in folders and boxes to emerge and become something beautiful. I have half-finished projects galore. But when to get to all of that? I'm not sure! As I have pondered this issue of mine, I have been reminded of what a very wise man has said recently:

"It's remarkable how much we can learn about life by studying nature. For example, scientists can look at the rings of trees and make educated guesses about climate and growing conditions hundreds and even thousands of years ago. One of the things we learn from studying the growth of trees is that during seasons when conditions are ideal, trees grow at a normal rate. However, during seasons when growing conditions are not ideal, trees slow down their growth and devote their energy to the basic elements necessary for survival.

Have you ever been in an airplane and experienced turbulence? The most common cause of turbulence is a sudden change in air movement causing the aircraft to pitch, yaw, and roll. While planes are built to withstand far greater turbulence than anything you would encounter on a regular flight, it still may be disconcerting to passengers.

What do you suppose pilots do when they encounter turbulence? A student pilot may think that increasing speed is a good strategy because it will get them through the turbulence faster. But that may be the wrong thing to do. Professional pilots understand that there is an optimum turbulence penetration speed that will minimize the negative effects of turbulence. And most of the time that would mean to reduce your speed. The same principle applies also to speed bumps on a road.

Therefore, it is good advice to slow down a little, steady the course, and focus on the essentials when experiencing adverse conditions." -Dieter F. Uchtdorf

So, I guess as I post this today, I just want you all to know how much I truly appreciate you bothering to read and follow my little blog. I truly value you and am grateful for your support!! I also want you to know that if it goes a week or so and you haven't heard from me...I'm not ignoring you, or quitting, or being irresponsible in my blogging (is there such a thing? lol) or some other crazy thing. I'm just...well, being forced to slow down and take care of the essentials for survival in my little home. And at this time of year, especially, I want to focus on my family and making this a meaningful time full of warm memories.

So please forgive me if I slow down through the turbulence of everyday living now and then. I need to read to my kids. Or hang out with my hubby. Or mop my floor. Or head over to my son's last basketball game of the season. Or fold that mountain of laundry. Or decorate our tree with the kiddos. Or just ponder on my many blessings at this glorious time of year.

Hugs and Christmas Kisses to all!!

Thursday, October 28, 2010

Mod Podge and a Little Glitter to the Rescue: Ruby Slippers in a Flash...and Cheap!


For those of you who know me well, you may recognize the trait in me that quite often, some of my best work is done in the 11th hour...It's not that I try to procrastinate. Rather, I stew or ponder on things, am busy with a plethora of additional priorities, but finally, when the hour of accountability is here, quick decisions must be made, and I am thrown into action.

My Halloween costumes are no exception! My littlest one wants to be Dorothy from the Wizard of Oz this year. Like many people I know, my budget for costumes that might be worn twice EVER is pretty slim. Okay, really slim. I looked for used ruby slippers on Ebay, but even then after shipping, the costs were near $15 to $20. Not sure of how to spend as little as possible and still meet her desires, I put it on the back burner of my brain and let the notion stew...

As I was cleaning out my daughter's closet the other day, I came across this pair of old Sunday shoes with the toes worn out. I was about to toss them into the garbage when the light went off in my head! These were just the Ugly Duckling version of Ruby Slippers!!!


A trip to the store for red glitter and a little digging in my craft closet for Mod Podge and a foam brush, and I was set. Now mind you, glitter is not for the faint of heart...It was easy as pie, although my house is glittering from end to end with sprinkles of red glitter. Ah, well....it vacuums, right?

Just in case you happen to be needing a last-minute costume like me, I've got your back! The first step of "Ruby Slipper Transformation" is to stuff the shoes with newspaper and paint the shoes with a layer of Mod Podge. Sprinkle the red glitter and let dry. Repeat those steps to add a depth of glittery-ness if desired.


When both layers are dry, clap the shoes together outside to shake off the loose glitter, then spray with a coat of polyurethane if you feel up to it. (Not sure that step is necessary, but I had hopes that it would seal the glitter together, preventing excess glitter from getting more-everywhere than it already was.)

Now, these ruby slippers are more for functionality than fashion. The glitter is chipping away in a few spots, and the bottoms got a little goopy with the Mod Podge, but I figure that they are going to be one-time-wonders for my little gal, and they only cost me the price of glitter: $2.99. Bargain.


Today, my challenge is to put together the Dorothy dress...Again, the Ebay prices and store prices were just way more than I was willing to pay. I thought about just figuring out a dress pattern myself, but here in the eleventh hour, thought better of that notion.


So....I did spend a little on this pattern, BUT, I'm considering this an investment, as the pattern is adorable and will be used again and again. I love the work from this gal, Carla C. I have collaborated with her in the past on various projects through You Can Make This, and her work is always top-notch and so very easy to follow and professional.

I'm banking on whipping it up in a flash. I have three hours until my kiddos are home from school to get it done. My Little Missy is very stressed out about this, and keeps reminding me that she doesn't think it will be done in time because "Halloween is only 3 days away!" She just doesn't know me very well yet, does she? ;)

Wednesday, October 6, 2010

The Crazy Halloween Dinner Tradition...Revisited


Last fall, I posted about our family's tradition of the Crazy Halloween Dinner. I had several people contact me for more details, so I thought I'd revisit this post again, but a little earlier in the season. It is such great fun! But BEWARE: After doing it once with your family, you just may be coerced into doing it again and again! Your kiddos and any guestswill love it.

Here is how it works:

As the hostess, begin by planning your menu for the evening. For us it generally consists of regular meal items such as chicken and potatoes, barbecued beef sandwiches, or some type of casserole. But as you can see in the photo above, my niece planned her menu using some unique food choices for the occasion. Either way works great...just don't feel pressure to fix anything out of the ordinary. The food itself is not necessarily the entertaining part of this meal...it is how it's presented that makes it such fun!

So, begin listing your menu items so that you have 12 things on your menu, but these will also include a drink, each of your utensils, and a perhaps a napkin. Here is an example:

1. Spaghetti and Meatballs
2. Green salad and dressing
3. Buttered peas
4. Garlic bread
5. Fresh fruit
6. Jello salad
7. Punch to drink
8. Pumpkin cheesecake for dessert
9. Napkin
10.Fork
11.Knife
12.Spoon

The next step is to get creative and assign a spooky and crazy name that provides a subtle hint as to what each menu item might be. For example, the garlic bread could be called "Tombstones"; the punch could be "Witches Brew"; and the spaghetti and meatballs...well, I'm sure you could come up with something that sounds totally disgusting!

Now create a menu that lists each of the crazy names on them, and a space in which to write the numbers 1, 2, or 3, which will designate which course that item will be served in. You will be serving 3 courses of four food items. (You could also serve 4 courses of three food items if desired.) Be sure to make a master "key" so you can easily remember what each food items are called!

The following is menu and key from a few years ago that you can use if you'd like. Just click to enlarge, and print.

When your guests arrive, give each person a menu and have them choose their food items for each course by numbering them 1, 2, or 3. The fun of this is that your guests won't know exactly what they are ordering, and little will they know that they are ordering their utensils as well! Be sure that each guest's name is on his or her menu, then collect them before you begin serving.

I line up all the menus on my counter, then dish up each person's plate according to what they ordered, then serve one at a time. After everyone is finished with their first course, I take their plates back (and any utensils they had for that course) and serve them their second course and so on. My hubby usually helps, so it goes quite quickly, and everyone is happy to chat for a bit between courses. And, the family who first introduced this tradition to us gave us this tip...that once a person's drink is served, he can keep his cup for refills throughout the rest of dinner. That is usually very appreciated!

Every year, someone inevitably orders their spoon, a knife, a side dish, and a roll for one course, and in the next they have their dessert, a main dish, a napkin, a drink, and no silverware. Yep, a little crazy, but lots of fun! It's especially entertaining when we have another family over to share the surprises with.

Last year, my niece and her husband hosted our dinner, so it was entertaining for me as well, as I didn't have a clue what I was ordering either! They were great hosts and came up with unique new dishes that our family hadn't tried before, which made it extra fun for us all!

The most popular and talked about dish of the night? The "Kitty Litter!" It consisted of vanilla pudding topped with crushed graham crackers and an occasional melted tootsie roll that looked like...well, you know what. Rather disgusting, but delightful for the youngsters at the same time!

Here is Blondie determining which menu items she wanted for each course:


A.W. had to eat his "Ogre Buttocks" (ham) and "Sliced Snail" (pumpkin roll) with a knife:


And by the time Blondie got to this course, she had no silverware!


It was a great night, and filled with some entertaining memories! The Crazy Halloween Dinner is a now a standard tradition in our home. If you give it a try, I would love to hear about your menus and how you made it special for your family.


Wednesday, December 30, 2009

New Year's Eve Tradition: A Visit from the New Year's Elf!


One of my favorite traditions of the holidays is the visit from the New Year's Elf! This is a tradition that my maternal grandfather began years ago, and my mother remembered it as a young child.

To receive a visit from the New Year's Elf, you simply place a pair of shoes under the Christmas tree on New Year's Eve (given that your tree is still standing--we leave ours up until January 1st). When you awake, you'll find that your shoes are filled with goodies: money, small treats, lip gloss, an orange, small boxes of sugary cereal---(you know, the ones that we parents rarely let our kids eat), and other trinkets that will fit inside the shoes. Some years he has brought small flashlights, puzzles, stuffed animals, Littlest Pets, gloves, chocolate oranges, and occasionally, if the shoes are in poor condition, he'll even exchange your old pair of shoes for new ones!

The New Year's Elf is not of the same gift-giving caliber as Jolly Old St. Nick....The Elf's gifts are small and more simplistic in nature. Just little tokens to enjoy as we celebrate the ringing in of a new year!

My husband's family does not share this same tradition. In fact, I know of no one outside of my own siblings that participates in anything like this. But my young children are always amazed at the fact that wherever we go for New Year's Eve, the Elf seems to find us, even if the homeowners are non-believers! One year at my in-law's house, their Christmas tree was already taken down, so we placed our shoes underneath a large plant that was in their front room. Lo and behold, not only were my own little family's shoes filled the next morning, but our grandparents' shoes as well!

No one (to my knowledge) is quite sure how this tradition got started, or why. My best guess is that my English grandfather liked the German custom of leaving shoes out on December 5 for St. Nicholas to fill. Somehow, he fixed the date for his own family to be New Year's Eve, and over time, the New Year's Elf was conceived. A common expression my extended family exchanges during the holidays is, "Don't forget to put your shoes out!"

If any of you share a unique or similar tradition in your family, I'd love to hear it!

Best wishes to all for a safe and Happy New Year!

Tuesday, November 24, 2009

FREE Embroidery Patterns and Gift Ideas


We received our first "real" snow of the season two nights ago in my little neck of the woods, and it has put us all in the mood for Christmas! With Christmas coming so quickly, I wanted to remind you of some fast and easy stitchery and gift projects one more time...and they are each FREE! Each embroidery design would work nicely for a dishtowel, a shelf pillow, as part of a stocking, an ornament, or a festive door hanger. And the additional projects would each make terrific gifts. Let your creativity and ingenuity run wild. Enjoy!

First is "Joy" and the Hanging Holiday Star seen above, available in both machine embroidery as well as hand-embroidery. Complete instructions are provided to make this festive hanging star out of recycled jeans! My kiddos also stitched this "Joy" design on dishtowels for their teachers last year for Christmas. If my 11 year old boy and 8 year old girl can do this, all of you can do this, I promise!


Next is the classic door hanger and the comforting "Home for the Holidays" sentiment. This design and complete instructions for making the hanger you see here are available here. Machine embroidery files are available here.


This "Believe" design is so simple, you'll be making loads.


At a recent sister's weekend, my sisters and I made these, and I also taught several Young Women in my neighborhood how to stitch on dishtowels using this pattern. We are using the dishtowels for an upcoming activity to line baskets of goodies for the widows and shut-ins in our area. I think it will be a lovely gift for them! This one's also available for hand and machine embroidery.


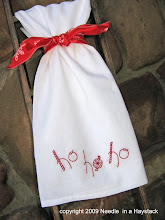
Many of you have already seen the "Ho, Ho, Ho" design that I published in July along with a back-stitching tutorial. Once you get the hang of the back-stitch, all the other stitches come easily! Again, a perfect and quick gift for the season.


For those of you with babies on your gift-giving list, how about a receiving blanket and burpie? Simple, special, and free.


How about a "Welcome Home" Table Runner published by You Can Quilt This for the home of a special friend? The embroidery patterns and directions are found here, and the machine embroidery files are all right here. I think that just one of these blocks turned into a pillow or wall-hanging would make a treasured gift.


If that particular runner seems too daunting, here is a simplified Sweetheart Table Runner that involves sewing only...and whips up quickly with festive or decorative fabric.


Hot pads are always a necessity...I'm planning to make several of these for gifts to give along with a loaf of yummy bread.


For the young gals in your life, this No-Sew Bag would be a hit! It's a great and inexpensive gift for tweens to make for their friends.

In addition to these ideas, did you know that there is a "Free" section found at SWAK Embroidery, You Can Make This, and You Can Quilt This, full of additional fun and simple gift ideas?

How about a head band for your little girl, a chef's hat for dress-up, and printable holiday gift tags? And don't forget a special "Santa" Pillowcase and holiday tradition idea created by my great friend Lorie!

Whew! So much to create, so little time! Be sure to check back soon, as I'll be featuring more Christmas Gift Ideas, AND, I have some BLACK FRIDAY deals and a give-away you won't want to miss!


Related Posts with Thumbnails
 
Designed By Aqua Poppy Designs for Needle in a Haystack Designs.
© Copyright. All Rights Reserved.