Showing posts with label food. Show all posts

Tuesday, November 22, 2011

Tradition: Simple Ways our Family Embraces The Thanksgiving Holiday


tra•di•tion
   trəˈdɪʃ ən[truh-dish-uh n] noun:
the handing down of statements, beliefs, legends, customs, information, etc., from generation to generation, especially by word of mouth or by practice.

The holiday season is the birthplace of many traditions that connect us as families and friends. Traditions give us something to look forward to, something to call our own, something to bind us to the crazy people we share bathrooms and living space with (and don't always get along with!).

Due to the fact that my husband often works on Thanksgiving, our family cannot frequently travel long distances to be with extended family. We've found that creating special traditions within our home helps make the day special---even if it's just the six of us eating together once again. This year will be no exception...we will miss celebrating with family and friends as my husband will be on call, but we are grateful for our ties that bind us across the miles.

Our traditions are not fancy or elaborate, but they are our own. Here are a few that we hold dear to our hearts:

1. Preparing the Thanksgiving Feast:


I'll admit, some days when we are in a rush for dinner to get to another activity, I dread those words, "Mom, can I help?" ( It goes so much faster if I don't have helping hands on those days...but I have a hard time turning down anyone who is interested in helping out in the kitchen, right?) Can anyone relate? But for me, Thanksgiving is different. When I just plan on spending much of the morning preparing to gather around the table, I love having the kids in the kitchen with me.


We take our time, we laugh, we learn some cooking tid-bits together, and the preparation of the food is as much of a pleasurable activity as eating it.

2. Expressing Thanks:


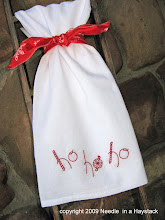
We began a simple tradition last year that will be a treasure to add to and to look forward to each November. It's simply our Thanksgiving Table Cloth. (You can see the larger version of it in the photo at the beginning of the post.) I purchased a plain cream-colored tablecloth and fabric markers from Wal-Mart, asked for family participation, and the tradition was born.

Before our meal, each person was invited to write his or her thoughts of gratitude right onto the tablecloth. (It was fun for the kids especially, to break the rules and write on something that Mom normally condemns!)

Looking back, I get a kick out of how life was a year ago....the misspelled words and thoughts of a sweet six year old. I adore her chunky letters and the care with which she wrote her feelings.


The simplicity of a 13 year old boy: food, football, girls.


That's probably on the gratitude list for most men, right?

Thankfulness for a day off... (some things haven't changed)


I'm looking forward to pulling this out again this Wednesday evening so everyone can see what he or she wrote, and prepare to add to it again this Thanksgiving Day.

3. Creating a Thanksgiving Craft:


My girls and I had a great time last year creating these little turkey favors. They are so simple: two knit gloves, a bit of ribbon, glue, googly eyes, and scraps of cardstock and rick-rack. Simple instructions for making them are here.


Aren't they goofy and darling all at the same time? The girls also felt it important to give them very original names...like Bob.


This year, these turkeys and acorns are the plan.


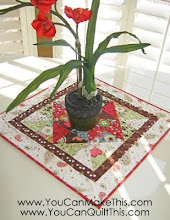
4. Memorable Place Settings:


Did you notice the plates in those pictures? My mother collected plates from a variety of places she visited during her lifetime, and I inherited them when she passed away, along with her glass goblets. We pull these out every Thanksgiving, and wrestle over which place we want to eat on this year. We think of Grandma Wray and it makes the meal that much more special. Something as simple as plates has a way of bringing us together.

5. Of course, Delicious Food!


Each family has their own version of favorite foods to indulge in on Thanksgiving. A few of ours happen to be Sweet Potato Rolls (my littlest has been begging for these for weeks now!) and...


Raspberry Pretzel Jello Salad---one that I first remember having with my sister in law, Connie. My sister ML serves this as well, and we now look forward to it each year.

"Family traditions are like spiritual and emotional cement in the foundation of a happy home. They create fond memories, and these memories bond us together as nothing else can."
Ensign March 1986

What are your Thanksgiving Traditions?

May you each have a bounteous and memorable Thanksgiving!


Thursday, September 1, 2011

Quick Granola Recipe


Seriously, I am addicted to this stuff. This is my new favorite go-to snack and breakfast food. My sweet friend Christina gave me this recipe before jaunting off to Germany for two years...(Miss you, my friend!) It is so easy and quick to make, and to die for! I think I've made about 8 batches in the last two weeks. (Okay, perhaps a slight exaggeration, but it's pretty close!)

Not only do I love the flavor, but the chewy texture with the crunchy cashews just reels me in. I crave this in my sleep...not even kidding.


Christina serves it warm from the oven with yogurt and fresh fruit (which is heavenly), and my little gal and I also love it like cold cereal in milk. It's one of her new favorite after-school snacks. Let me know what you think!

Quick Granola (This is a small batch...I usually double it)
2 c. quick oats
1/2 c. honey
1/3 c. oil
1/2 tsp. vanilla
1/2 tsp. salt
cashews (or any type of nut)

Bake at 400 for 8 minutes (stirring half way through)for a soft, chewy texture. Bake a little longer if you like it crunchy.

This is the basic recipe, but of course you can add sunflower seeds, flax seeds, almonds, wheat germ, coconut, raisins, or anything else you love. Enjoy!


Tuesday, July 5, 2011

Corn on the Cob Cupcakes


I hope everyone had a fantastic 4th! Summer is flying by and I just had to share with you this cutest treat that my darling neighbor Judy brought to me...Don't let these "ears" deceive your eyes! I know...I did a double take too! My kids all had to look twice too, and they thought these were the coolest.

Corn on the Cob Cupcakes...how clever! So I had Judy give me her secrets to this deceptive goodie (and they are VERY simple). All you need is the following for each ear of corn:

* 3 baked yellow or white cupcakes in white cupcake papers
* 1 corn on the cob tray
* 2 corn holders
* white frosting
* yellow Jelly Belly jellybeans for the kernels (I think she used Buttered Popcorn flavor and Lemon)
* one yellow Starburst candy for the pat of butter
* black sugar for the pepper(apparently found on the cake decorating aisle of the craft stores---unfortunately I'm not too familiar with that aisle)

Assemble the cupcakes in the tray, frost, add the Jelly Bellies in rows, and add the pat of butter and black sugar. Insert the holders to each end and there you have a fun, unique, and "corny" summer treat.

Enjoy!

Thursday, March 17, 2011

Rainbow Jello and Jimmer...What Could be Better to Celebrate the Tip Off of March Madness?


I love having something to look forward to. It prevents the doldrums of life's daily grind from taking over, doesn't it? Today I'm so looking forward to those two things: Rainbow Jello and Jimmer. Rainbow Jello is a pretty-much-once-a-year-tradition for us, since it takes some prep, and coordinates so nicely with St. Patty's Day. Just not something I get around to much at other times of the year, but definitely something to look forward to in March. I love how it looks, the creaminess from the added yogurt, and the melding of all those rainbow-y flavors. Yes, it's a St. Patty's treat for sure! Visit HERE for the recipe and the how-to's, along with some helpful photos.

And Jimmer? We've been a fan for a while now. Our family had the opportunity to see him play in person last year when he was still a somebody, but not quite the SOMEBODY that he is today. Jimmermania struck our house early this season, and we've loved seeing how he has taken the NCAA by storm.

It helps that basketball is in our family blood---my father played in the forty's in the Final Four for the California Bears as a guard; my hubby was a guard in the eighty's with his high school team that took the state championship his junior year and finished third his senior year; and all four of our tikes have played since they could hold a ball. Our oldest was shooting baskets almost before he could walk. This year all four were on teams...one on the junior high team, the others on city league teams with my two boys playing together. That was the highlight of my week, seeing each of my kids grow and learn on the court. Even my little gals became quite the scrappers and shooters; my littlest one scoring her first basket in her last game (she was the only girl on her co-ed team), and my older daughter scoring the winning points in overtime of her last game. And watching my two boys joke, laugh, pass, assist, and score together on the court was completely heart-warming from a mom's perspective. I am convinced that there are metaphors and plenty of life's lessons that are gained on the court and from participating on a team.

And... it helps that I am a BYU Alum. I couldn't be more proud of my Cougars and the way they have handled the intense media revolving around the highs and lows of their season. They are a class act team, and we're cheering for "Freddy Cougar" (my boy's nickname for Jimmer) and his posse to get further in the brackets than ever before.

So, find something to look forward to today. Make yourself some Rainbow Jello and enjoy the Jimmer Show and the rest of the March Madness entertainment. I'm certain that neither will disappoint!

Thursday, February 17, 2011

Honey Lime Enchiladas and Sweet Rice


Good morning, friends! I hope you all had a happy and delightful Valentine's Day! It was interesting at our house, to say the least. But! We did have our Sweetheart Dinner, we did learn some fancy manners, and surprisingly, everyone cooperated, (even the teenagers) and we had an enjoyable dinner. (So, yay! Check one off for learning something new at our house!)

I did promise the recipes for our very favorite meal at our house...it's the one that gets requested the most by the most. Unfortunately, I forgot to take pics during the meal, but thought of doing it the next day with those that were left, but that fell through too. So...I borrowed this photo from Mel's Kitchen Cafe.
It was interesting as I tried to find the original source for this recipe. It appears to have been passed around the net and tweaked here and there. I first saw it on Good Things Utah prepared by Holly Hanks. She gives credit to Mel's Kitchen Cafe who gives credit to the Sister's Cafe. The buck apparently stops there, but I'm sure it's been passed around at various other places as well. As like most of us, I have tweaked the recipe to our own family's liking, so I hope you enjoy one of our faves!

Honey Lime Chicken Enchiladas

*1/3 c. honey
*1/4 c. lime juice
*2 tsp. chili powder
*2 large cloves garlic or 1/2 tsp. garlic powder

*About 2 large chicken breasts, cooked and shredded
*10-12 flour tortillas (I prefer using the uncooked tortillas--once you try them, you'll never go back to pre-cooked tortillas!)
*2 cups shredded cheese (Mexican, cheddar, Monterrey Jack---whatever you have on hand)

*14 oz. of mild green enchilada sauce
*3/4 c. heavy cream

1. In a bowl, combine the honey, lime juice, chili powder, and garlic. Toss in the cooked and shredded chicken; cover and marinate in the refrigerator for about a half hour or so.

2. Cook the raw tortilla shells according to the directions on the package. It only takes a few seconds to brown them. Stack on a plate as they are cooked.

3. Spray a 9 x 13 baking dish with non-stick cooking spray. In another small bowl, combine the enchilada sauce and cream. Pour about 1/2 cup of this mixture in the bottom of the baking pan. Set the rest aside.

4. Remove the chicken mixture from the fridge. Spoon a large spoonful onto one tortilla, creating a line across the center of the tortilla. Top with a large pinch of cheese and roll up the tortilla. Place the enchilada seam side down in the baking pan at one end. Repeat with the remaining tortillas until the pan is full.

5. Pour remaining enchilada sauce and cream over the top of the enchiladas and top with remaining cheese. Bake at 350 for 30 minutes until cheese is bubbly and starting to brown.


Sweet Rice

(I found this recipe at http://www.recipezaar.com/. It is a yummy side dish and also perfect for stuffing into burritos or adding to salads. Remember, it is meant to be sweet...I love it!

*2 T. vegetable oil
*1/2 white chopped onion (I even use onion flakes in a pinch)
*1 1/3 c. white rice
*3 c. chicken broth
*1/3 c. white sugar

1. Pour oil into bottom of pan, add onion and saute until translucent.

2. Add the rice cooking until it is light brown, being careful not to burn.

3. Combine the broth and sugar, letting the sugar dissolve. Stir into rice until combined and bring to a boil.

4. Cover and let cook on low until rice is done, about 25-30 minutes. Fluff with a fork before serving.


I hope you enjoy these family favorites! They are the best, I tell you!

Tuesday, February 1, 2011

Peanut Butter Bliss...Two Irresistible Recipes


My sister used to have a quote in her kitchen that read, "Everyone needs to believe in something...I believe I'll have another cookie!" And, of course, I have followed in my big sister's footsteps. This should be my first clue as to why I can't seem to whittle my waistline or lose those ever-lingering 15 pounds...I'm in love with cookies and donuts and these peanut butter goodies are no exception. And can you believe, I never even tasted either of these cookies that I can remember until my neighbors introduced them to me about 8 years ago. Tragic, I know. Now they are a household staple.

My kids request either of these two recipes anytime they have the opportunity to choose a homemade goodie, and almost within hours, the entire batch has completely vanished. Of course, that's my kids' fault--I only take a small bite...or maybe two...or a few nibbles...then a few hours later, just a few more. Certainly, I am not responsible for the disappearance of these yummy goodies!

In case you need a peanut butter and chocolate fix, here are my two fave recipes. And beware....they are not for the weak and faint of heart, nor anyone not wanting a temporary clog of the arteries. (These Peanut Butter Bars require an entire jar of peanut butter for their peanut-y goodness. Yowza.) But boy are they worth it!

Peanut Butter Bars

1 c. butter, softened
1 c. sugar
1 c. brown sugar
2 eggs
1 c. peanut butter
2 tsp. vanilla
1 tsp. baking soda
1/2 tsp. salt
2 c. flour
2 c. oatmeal

Cream together butter and sugars, add eggs, peanut butter, and vanilla. Mix dry ingredients together, and add to the butter mixture. Press into a large (10x15)
jelly roll pan or cookie sheet. Bake at 350 degrees for 15-20 minutes until lightly golden brown along the edges. Let cool.

Frost with peanut butter (this usually uses up the rest of my peanut butter jar), and then with Chocolate Frosting (recipe below).

Chocolate Frosting

6 T. butter, softened
6 T. cocoa
2 2/3 c. powdered sugar
2 tsp. vanilla
2-3 T. milk

Beat butter and cocoa until blended. Gradually add powdered sugar, vanilla, and milk.


Peanut Blossoms

1 c. sugar
1 c. brown sugar
1 c. butter
1 c. peanut butter
1 tsp. vanilla
1/4 c. milk
2 eggs
3 1/2 c. flour
1/2 tsp. salt
1 tsp. baking soda
Unwrapped Hershey's Chocolate Kisses
1/2 cup sugar set aside

Cream butters and sugars together, then add the rest of the wet ingredients. Mix in the dry ingredients. Roll into 1 1/2 inch balls, then roll in sugar. Place on cookie sheet and bake at 375 degrees for 7-9 minutes. While still warm, press a chocolate kiss in the center of each cookie and let cool.

Enjoy!!

Thursday, November 18, 2010

Two of My Favorite Holiday Dishes!


I think I've officially made it official...I am in love with November. I imagine in great part my thoughts of November are laced with happy memories and occasions: My dad's birthday, my parent's anniversary, my husband and son's birthday, and of course, Thanksgiving. I love the simplicity of the holiday---no expected gifts to give, no costumes to conjure up, no massive amounts of candy to buy. Just a beautiful meal intertwined with notions of gratitude and thanks, shared with the ones we love the most. I truly love it.

We recently shared a pre-Thanksgiving dinner with a dear family in our neighborhood who is moving the day before the holiday and will likely be spending Thanksgiving Day traveling. We had all the traditional yummy foods, and I shared two of our family's favorite holiday dishes: My sister's "Raspberry Pretzel Salad" and my dear friend Lara's "Sweet Potato Crescent Rolls". They are both fabulous recipes and I would love to share them with all of you. I promise you won't be disappointed!


Raspberry Pretzel Salad


2 c. smashed but chunky pretzels
3 T. sugar
1/2 c. melted butter

8 oz. cream cheese
1 c. sugar
1 small can (or half of a large one) crushed pineapple
8 oz. Cool Whip Topping

2 small or one large package raspberry Jello
2 c. boiling water
1 package frozen raspberries

Directions:
1. Mix pretzels, 3 T. sugar and melted butter. Bake in a 9 x 13 oblong casserole dish for 5 minutes at 400 degrees.
2. Blend together cream cheese, 1 c. sugar, pineapple, and Cool Whip. Pour mixture over cooled pretzels and refrigerate.
3. Mix Jello with 2 c. boiling water until dissolved and add frozen raspberries. Mix until syrupy.
4. Refrigerate Jello mixture until it is no longer runny, then pour on top of cream cheese mixture and chill until completely set up.
5. Slice into squares and serve. Yummy!!!


Sweet Potato Crescent Rolls (this recipe is actually doubled for feeding a larger crowd. You can half it for a smaller amount of rolls if desired.)


2 c. hot water
1 c. sugar
4 pkgs. active dry yeast (equivalent to 9 teaspoons or approx. 3 tablespoons)

1 29 oz. can Cut Sweet Potatoes, drained and mashed
1 c. butter
2 eggs

3 tsp. salt
9 1/2-10 cups flour

1/2 c. melted butter

Directions:
1. In a small bowl, dissolve sugar in hot water. When water has cooled to a warm temperature, add yeast and allow to foam up a bit.
2. While yeast mixture is sitting, beat together the potatoes, butter, and egg in a mixer.
3. Add the yeast mixture when ready, followed by the salt.
4. Add the flour a few cups at a time to form a stiff dough.
5. Knead until smooth.
6. Place dough in a greased bowl and let rise about an hour until doubled. Punch down and divide into six sections.
7. Roll each section into a circle and slice into several wedges.


8. Brush with butter and roll into a crescent shape starting at the wide end.


9. Place on greased baking sheet and let rise.
10. Bake at 375 degrees for 13-15 minutes, or until golden brown, depending on your oven.

I hope you enjoy planning your meal for the upcoming holiday!! What are your favorite holiday dishes?? I'd love to hear!

Wednesday, November 3, 2010

A Merry Un-Halloween...


Yes, I breathe a sigh of relief every time November rolls around. The Halloween festivities, parties, costumes, and trick-or-treating are all great fun, yet most of the time stressful too. I must say, I am one happy chick when it is all over. Does that make me a Halloween Scrooge? Hmmm...Perhaps a tiny one. With that said, I leave you some images of our Halloween festivities and gleefully say farewell to Halloween, and give a hearty welcome to November! A Merry Un-Halloween to you!!


Shortly after I posted my last posting about creating the Dorothy costume, my sweet neighbor and friend Dana called to let me know she had a Dorothy dress my little gal could use. (Hooray!!) I hadn't gotten too far on the dress I had started making, so I decided to revamp it a little and make it into an actual dress, rather than a costume to give her for Christmas. (Hopefully, I won't put that off until the eleventh hour!)

And my other little gal (yes she's a SHE) dug through our box of wigs and found my hubby's old football jersey for a completely cost-free costume as well. Gotta love that! (And don't you just love that mullet? It's the best.) I was a bit melancholy however, as my boys were too old and of course too cool for dressing up this year---sad for me to realize that those days of Woody/Puppy/Nerd/Hobo/Goldilocks (yes, your read it right) costumes are now simply memories...


On the Saturday before Halloween, our church had a "Trunk or Treat"---a unique tradition of parking our cars in a parking lot and trick-or-treating at each other's car trunks...(crazy, I know). Anyhoo, my little gal had gotten her fill of candy and as it was cold and rainy that night, she opted to stay home and hand out candy to the trick-or-treaters. She sat perched here on this chair by the door, waiting for the door bell to ring. Each time she'd shut the door after handing out candy, she'd exclaim, "Yes!! This is sooooo much fun!!" Can't argue with that kind of glee.


And our Crazy Halloween Dinner turned out to be great fun once again. Here you can see my son eating his "Wrapped Raven Remains" (chicken enchiladas) and "Goopy Grave Markers" (brownies, ice cream, and topping) with his "Vampire Vengeance" (knife). Ah, good times.

Merry Un-Halloween!

Wednesday, October 6, 2010

The Crazy Halloween Dinner Tradition...Revisited


Last fall, I posted about our family's tradition of the Crazy Halloween Dinner. I had several people contact me for more details, so I thought I'd revisit this post again, but a little earlier in the season. It is such great fun! But BEWARE: After doing it once with your family, you just may be coerced into doing it again and again! Your kiddos and any guestswill love it.

Here is how it works:

As the hostess, begin by planning your menu for the evening. For us it generally consists of regular meal items such as chicken and potatoes, barbecued beef sandwiches, or some type of casserole. But as you can see in the photo above, my niece planned her menu using some unique food choices for the occasion. Either way works great...just don't feel pressure to fix anything out of the ordinary. The food itself is not necessarily the entertaining part of this meal...it is how it's presented that makes it such fun!

So, begin listing your menu items so that you have 12 things on your menu, but these will also include a drink, each of your utensils, and a perhaps a napkin. Here is an example:

1. Spaghetti and Meatballs
2. Green salad and dressing
3. Buttered peas
4. Garlic bread
5. Fresh fruit
6. Jello salad
7. Punch to drink
8. Pumpkin cheesecake for dessert
9. Napkin
10.Fork
11.Knife
12.Spoon

The next step is to get creative and assign a spooky and crazy name that provides a subtle hint as to what each menu item might be. For example, the garlic bread could be called "Tombstones"; the punch could be "Witches Brew"; and the spaghetti and meatballs...well, I'm sure you could come up with something that sounds totally disgusting!

Now create a menu that lists each of the crazy names on them, and a space in which to write the numbers 1, 2, or 3, which will designate which course that item will be served in. You will be serving 3 courses of four food items. (You could also serve 4 courses of three food items if desired.) Be sure to make a master "key" so you can easily remember what each food items are called!

The following is menu and key from a few years ago that you can use if you'd like. Just click to enlarge, and print.

When your guests arrive, give each person a menu and have them choose their food items for each course by numbering them 1, 2, or 3. The fun of this is that your guests won't know exactly what they are ordering, and little will they know that they are ordering their utensils as well! Be sure that each guest's name is on his or her menu, then collect them before you begin serving.

I line up all the menus on my counter, then dish up each person's plate according to what they ordered, then serve one at a time. After everyone is finished with their first course, I take their plates back (and any utensils they had for that course) and serve them their second course and so on. My hubby usually helps, so it goes quite quickly, and everyone is happy to chat for a bit between courses. And, the family who first introduced this tradition to us gave us this tip...that once a person's drink is served, he can keep his cup for refills throughout the rest of dinner. That is usually very appreciated!

Every year, someone inevitably orders their spoon, a knife, a side dish, and a roll for one course, and in the next they have their dessert, a main dish, a napkin, a drink, and no silverware. Yep, a little crazy, but lots of fun! It's especially entertaining when we have another family over to share the surprises with.

Last year, my niece and her husband hosted our dinner, so it was entertaining for me as well, as I didn't have a clue what I was ordering either! They were great hosts and came up with unique new dishes that our family hadn't tried before, which made it extra fun for us all!

The most popular and talked about dish of the night? The "Kitty Litter!" It consisted of vanilla pudding topped with crushed graham crackers and an occasional melted tootsie roll that looked like...well, you know what. Rather disgusting, but delightful for the youngsters at the same time!

Here is Blondie determining which menu items she wanted for each course:


A.W. had to eat his "Ogre Buttocks" (ham) and "Sliced Snail" (pumpkin roll) with a knife:


And by the time Blondie got to this course, she had no silverware!


It was a great night, and filled with some entertaining memories! The Crazy Halloween Dinner is a now a standard tradition in our home. If you give it a try, I would love to hear about your menus and how you made it special for your family.


Thursday, August 5, 2010

Scrumptious Snickers Salad


On a recent Sunday afternoon when we were all home, I decided to try a new recipe I spotted on a local talk show. It is a crazy combination, which is what intrigued me and motivated me to try it in the first place. But guess what? It is deelish! Almost more of a dessert than a salad--and perfect for entertaining or for a unique potluck item for those summer parties. Ready for the ingredients?

*Cool Whip
*Cream cheese
*Powdered sugar
*Apples
*Frozen Raspberries
*Chopped Snickers Candy Bars (yup! )


Go to this link for the recipe details. The mixture of the crunchy apples and chewy, chocolatey Snicker Bars with the creamy Cool Whip and cream cheese, accented with the raspberries is all to die for! If you try it, let me know what you think. I think you just might dream of this salad.
Related Posts with Thumbnails
 
Designed By Aqua Poppy Designs for Needle in a Haystack Designs.
© Copyright. All Rights Reserved.